Connecting AI to NetSuite Using MCP
NetSuite’s Model Context Protocol (MCP), built in partnership with Anthropic, helps users leverage AI to ask simple, natural-language questions and get back complex, structured analysis, all powered by live NetSuite data.
This practical use of AI can be used to generate reports, create or update records, perform queries, analyze reports, automate workflows, or make predictions based on real-time data.
Here's how you can get started and connect AI to NetSuite using MCP:
1. Login to NetSuite and navigate to Customization → SuiteCloud Development → SuiteApp Marketplace.
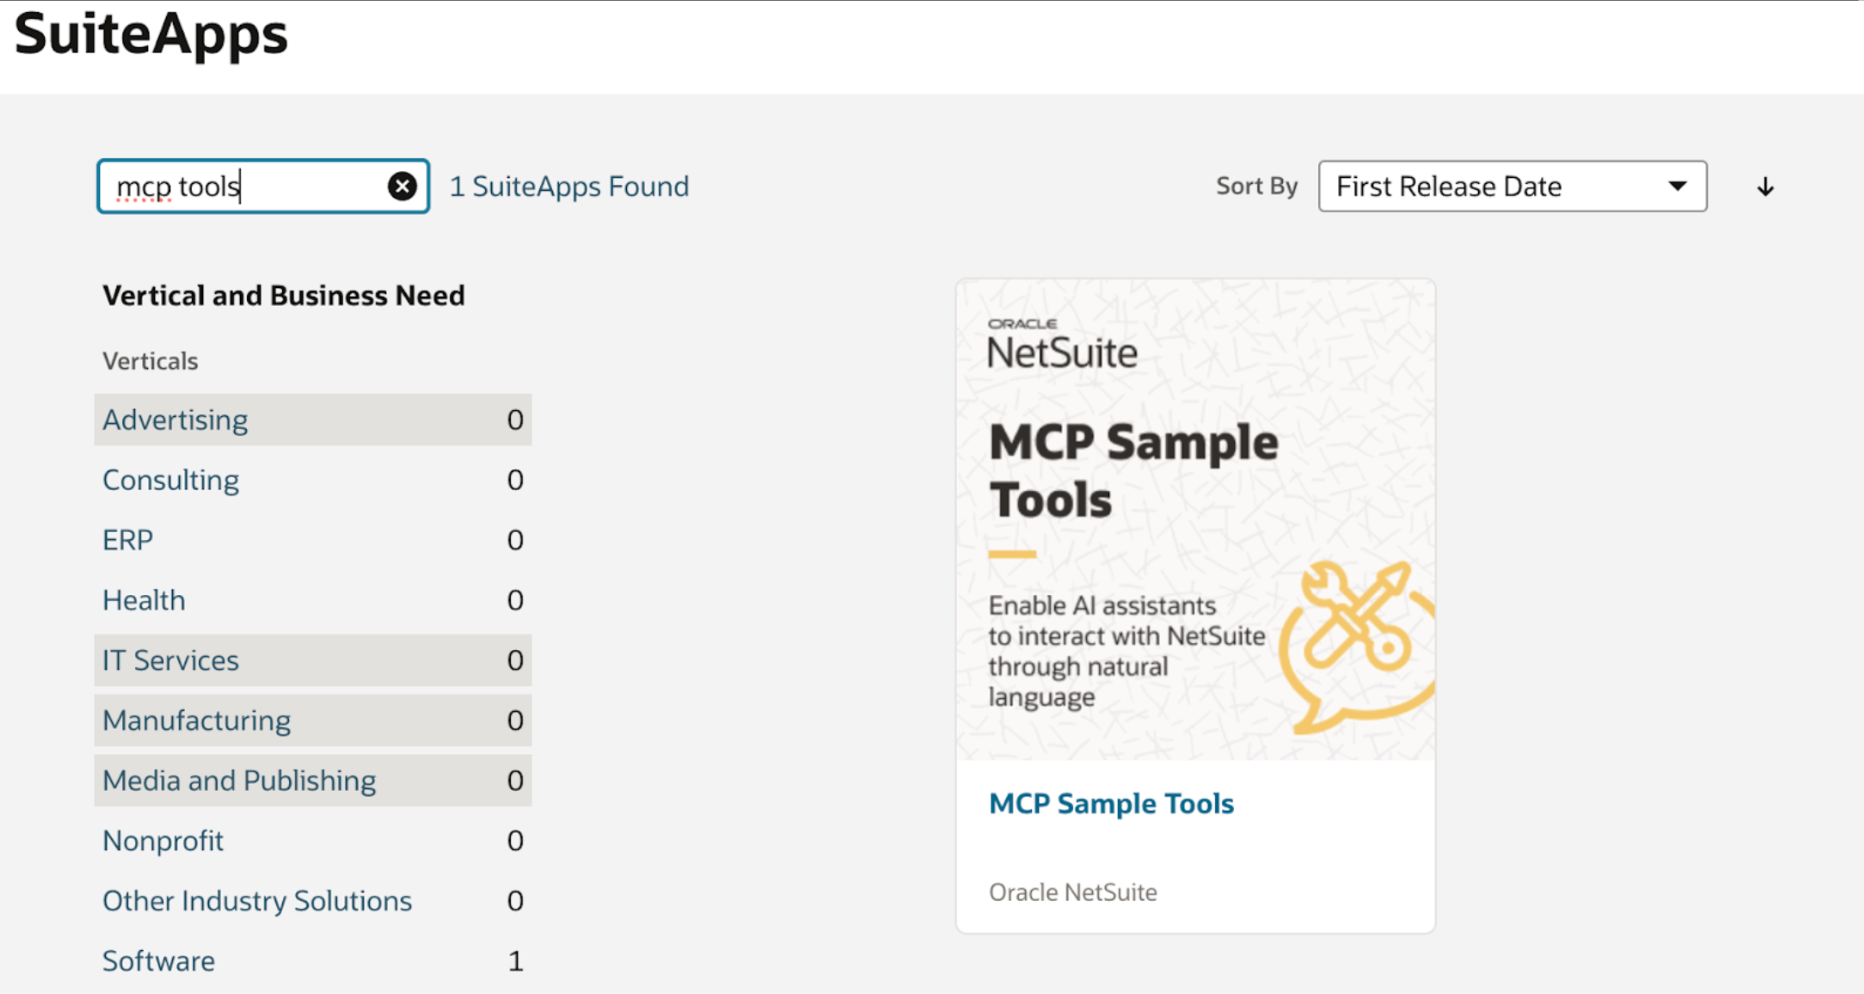
2. Search “MCP Tools” > Click on the icon and install the MCP Tools SuiteApp
3. Create a custom role for the connector to use. The permissions set on this role will determine what records the AI tool can interact with and how it can interact with them (the Admin role cannot be used) Our recommendation to minimize risk is to use the CEO (View Only) role. This allows the AI to see almost all records right out of the box but prevents it from being able to interact or change any of them.
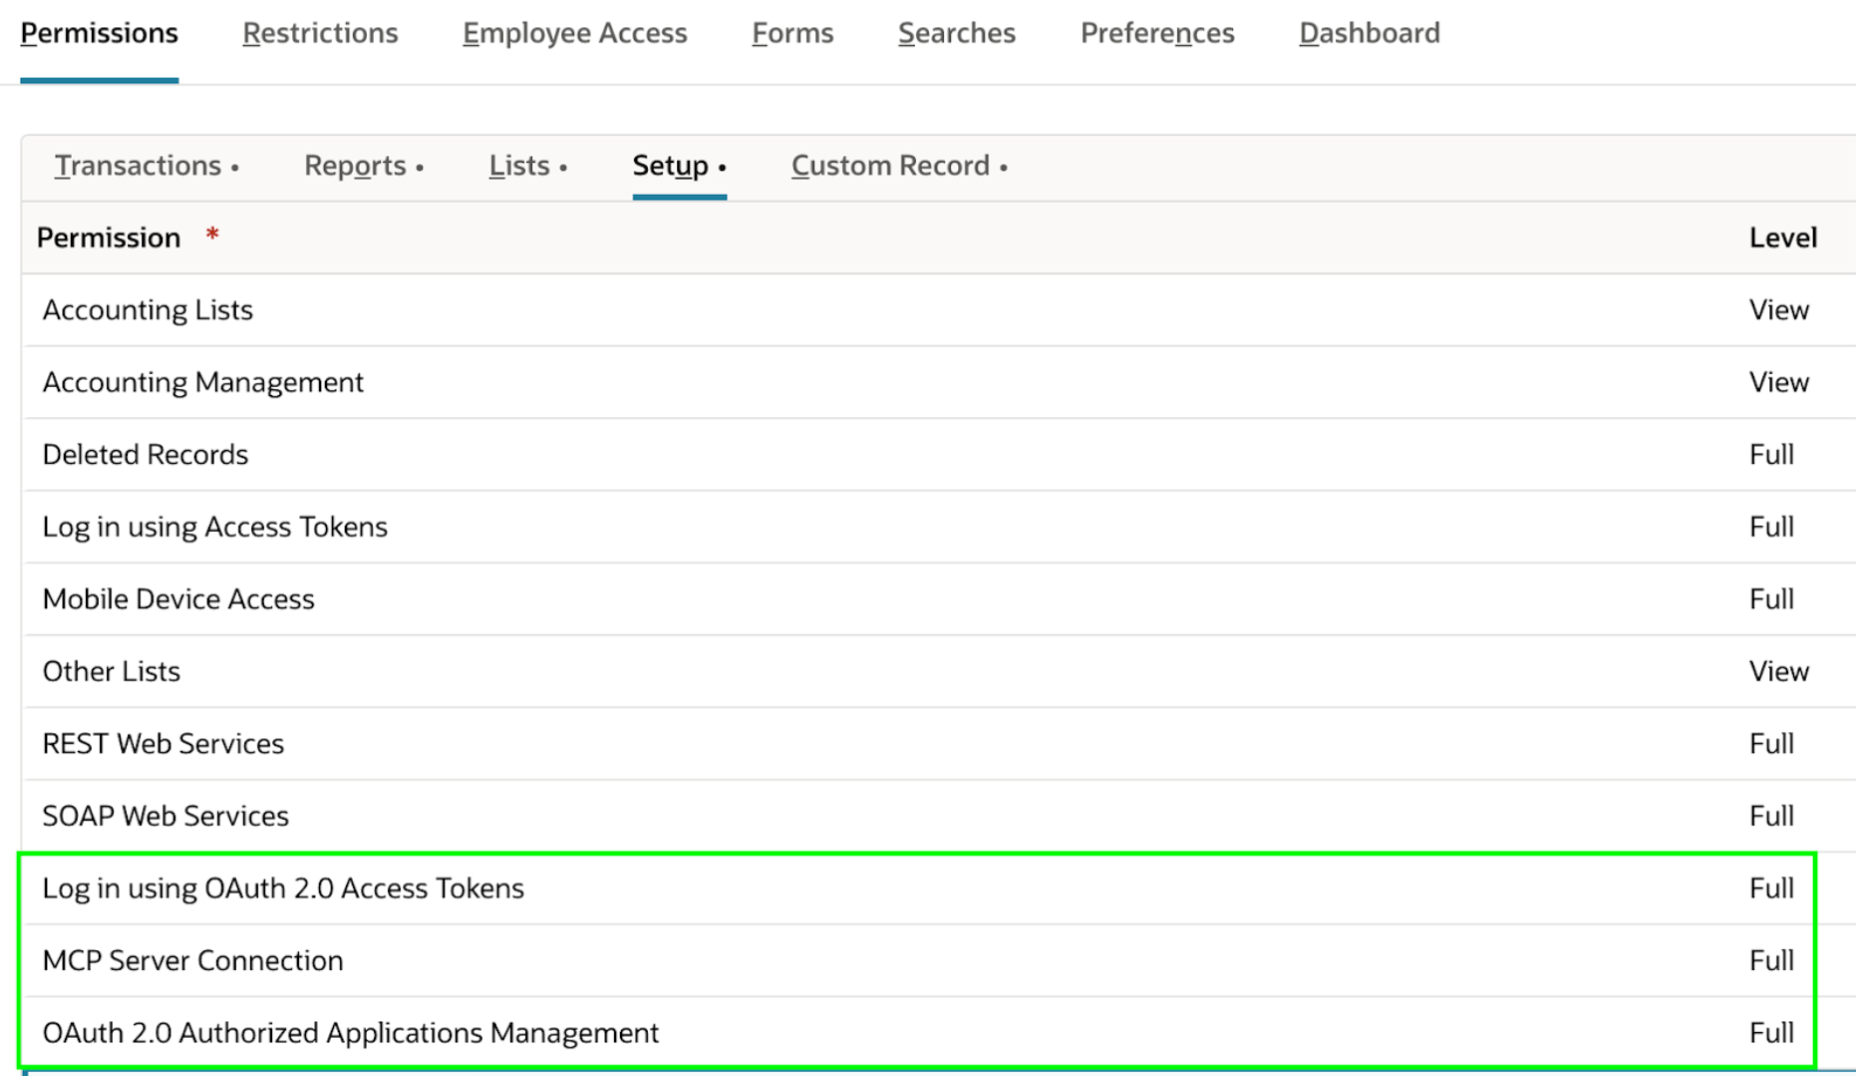
4. You will need to add the following permissions to the custom role you created found under the Setup subtab on the Permission
- Log in using OAuth 2.0 Access Tokens > Full
- MCP Severer Connection > Full
- OAuth 2.0 Authorized Applications Management > Full
5. Login into Claude (you will need an account with the Pro Plan to connect to NetSuite with MCP).
6. In Claude navigate to Settings > Connectors > Add custom connector
7. Give a name to the connection “Acme Co - NetSuite Sandbox” and enter this URL updated with your NetSuite account number in the bolded portion https://<account_id>.suitetalk.api.netsuite.com/services/mcp/v1/all. It should look like the following; https://<1234567>.suitetalk.api.netsuite.com/services/mcp/v1/all or https://<1234567-sb1>.suitetalk.api.netsuite.com/services/mcp/v1/all if connecting to a sandbox.
8. Click add to complete the connection and then click Connect. This will take you to a NetSuite login screen where you will want to select “Choose another role” and then select your custom role created in Step 4. You will then have to click Allow to let Claude connect to Netsuite.
9. This will automatically create an integration record in NetSuite. Congrats, you have successfully connected Claude to NetSuite.

10. Go back to Claude and on the main prompt screen click the filters option and select your NetSuite connection from the list. Here based on the permissions you gave the NetSuite role you will see a list of different actions Claude can take. Enable/disable as you see fit. Now you can prompt Claude with any actions or questions you want and it will review your NetSuite data and give you an answer.
We have tested creating a new customer record, changing the subsidiary on a record, and asking data analysis questions in natural language like “Looking at invoices what was our best selling product over the last 90 days.”
To provide specific examples of what this could look like in action, we shared five real world use cases for Job Shop CPQ that highlight the power and speed of using AI to gain insights and make decisions that benefit you and your customers.
As always, our team is here to help, so you can
message us here if want to talk to someone from our team about working with SuiteDynamics.